
I always think it looks in equal parts brilliant and terrifying when
there are so many layers of fabric draped over the machine when you are in the midst of a crucial stage.
This is the moment during the making of my second Belladone dress when everything seemed like it was almost coming together but there still seemed to be so much going on; I was scared of forgetting which pieces were supposed to be stitched together and which were not.
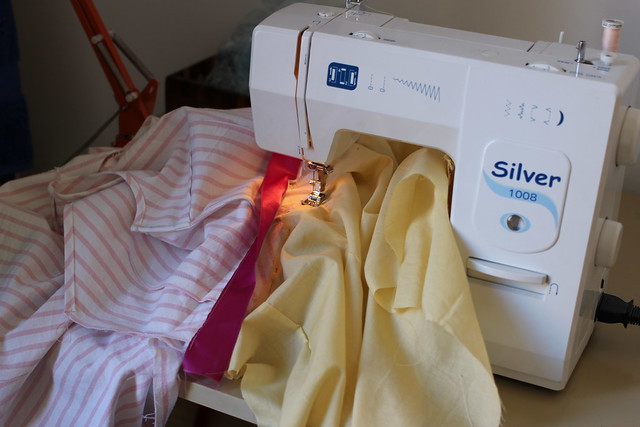
But luckily it worked out and now I have a second Deer & Doe Belladone dress, this time in light pink stripes!

 Step 2:
 Step 3:
Tape the pattern pieces in place and smooth out the seam line to make sure it is straight.
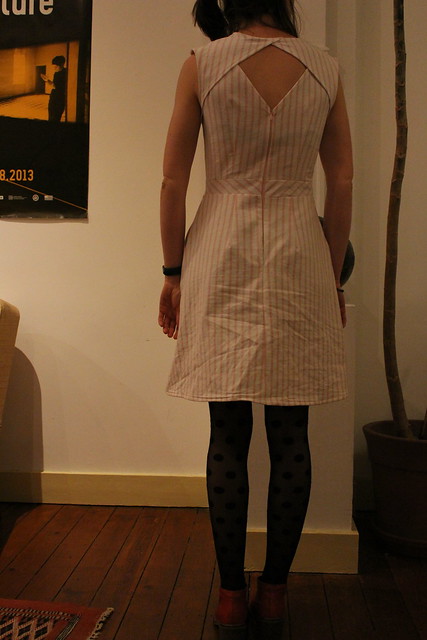
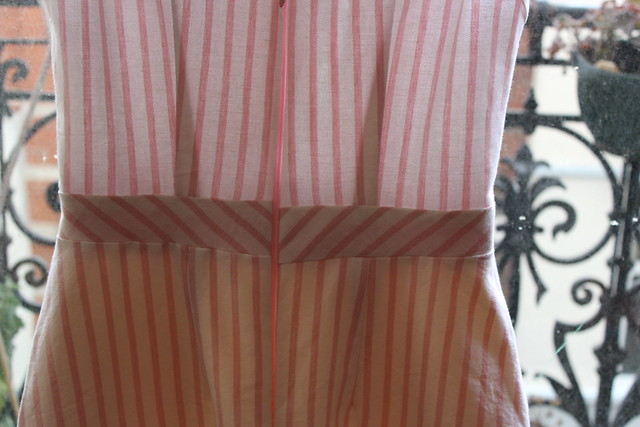
 It was also great to read Lauren's post as not only was it useful in terms of the adjustments, it was very useful in terms of stripe matching! I copied how she did it in terms of matching up the chevrons at the waistband, and did my best to line up the other pieces.
Here it looks OK I think...
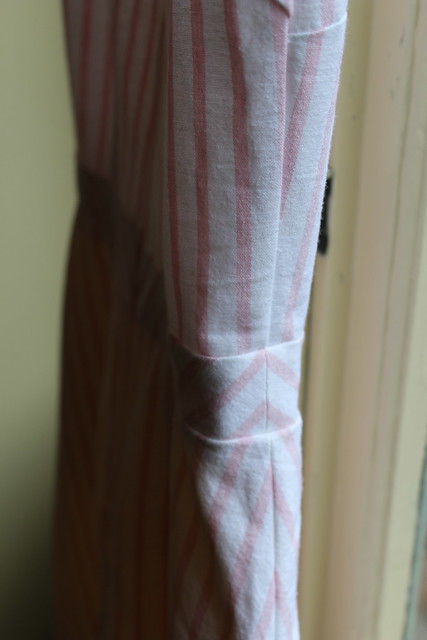
...but it is a bit off kilter at the centre back...whoops...
 Adding a lining
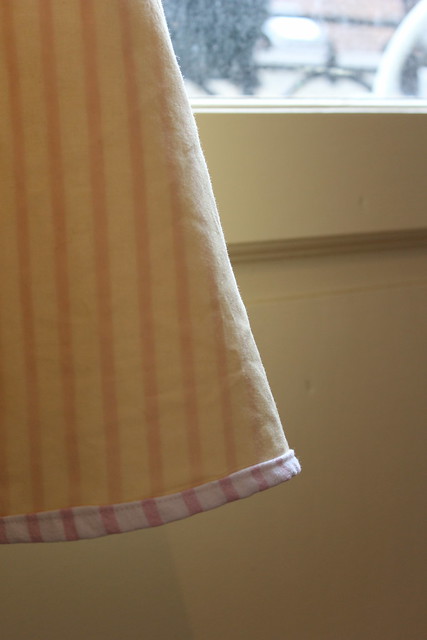
As the fabric (cotton) is quite thick and not particularly smooth, I thought it would be comfier to line the skirt so I used some lightweight yellow cotton batiste.
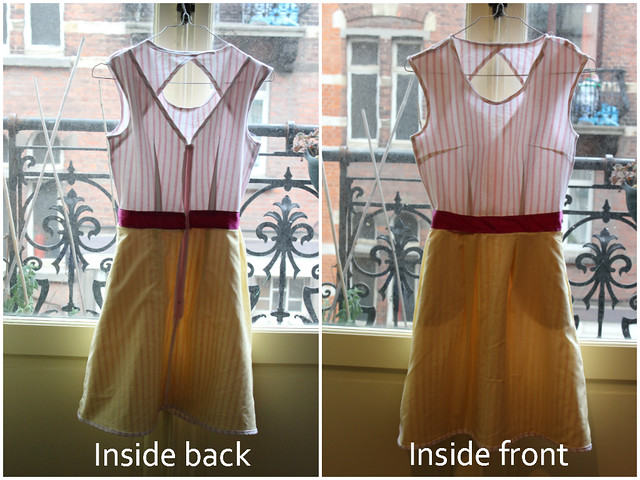
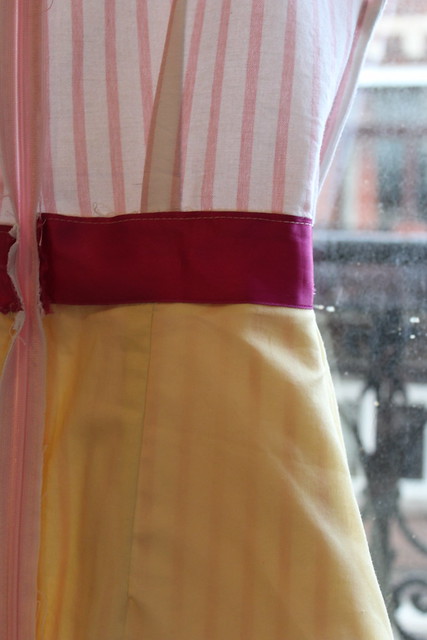
I attached the lining to the seam that joins the bodice and skirt pieces. Then I sewed the zip in, attaching it to both the outer fabric and the lining at the same time
I sewed on some ribbon to hide the seams on the inside. This ribbon just happened to be what I had lying around (pretty sure this ribbon was bought in Glasgow going on seven years ago or something silly, so nice I finally got round to using it...). But I actually think the colours go together really well together, as if it was all meticulously planned, ha.
The resulting colour scheme really makes me think of sweets and wrapping paper. So maybe I should wear it with black tights and black nail varnish or something so it is not too sickly sweet.
Don't look too closely, I see some stray ends of thread....
The lining is also fully contained in the hem, so there is no way it's going anywhere now that I've locked it down completely.
Now, to think about what kind of Belladone my third will be.
This is the moment during the making of my second Belladone dress when everything seemed like it was almost coming together but there still seemed to be so much going on; I was scared of forgetting which pieces were supposed to be stitched together and which were not.
But luckily it worked out and now I have a second Deer & Doe Belladone dress, this time in light pink stripes!
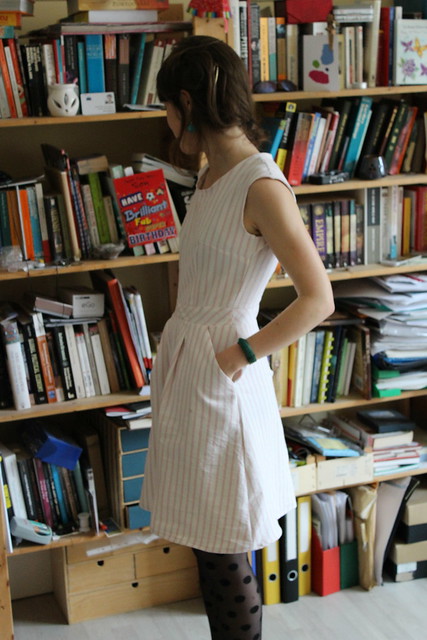
Small bust adjustment
As explained in my previous post about my Belladone wearable muslin (which has incidentally been worn a lot recently with this lovely early Belgian spring), I had to do an SBA on the pattern. I just went for it and cut it out straight away on this fabric without doing a test first – living on the edge.
It worked perfectly though and the fit is just right.
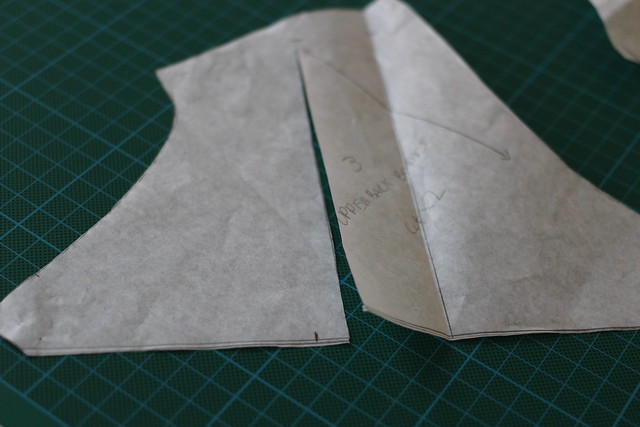
I followed Lladybird's slash and pivot adjustment method for removing excess on the upper back piece. I took some pictures too so you can see the exact steps of what I did as I always like to see close up images of pattern adjustments!
Step 1:
Slash up the middle of the pattern piece at a right angle to the seam line. Leave a wee hinge about 1.5cm long.
As explained in my previous post about my Belladone wearable muslin (which has incidentally been worn a lot recently with this lovely early Belgian spring), I had to do an SBA on the pattern. I just went for it and cut it out straight away on this fabric without doing a test first – living on the edge.
It worked perfectly though and the fit is just right.
I followed Lladybird's slash and pivot adjustment method for removing excess on the upper back piece. I took some pictures too so you can see the exact steps of what I did as I always like to see close up images of pattern adjustments!
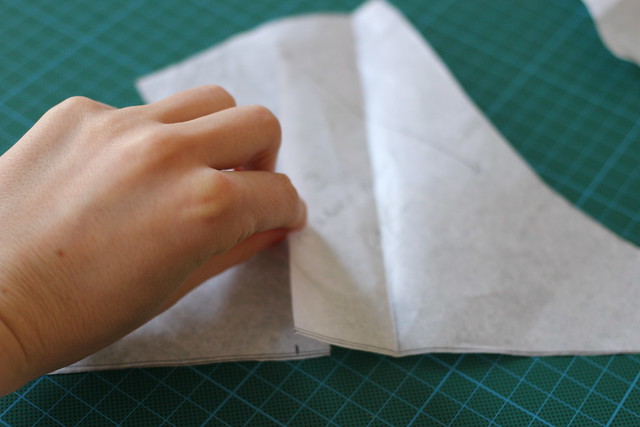
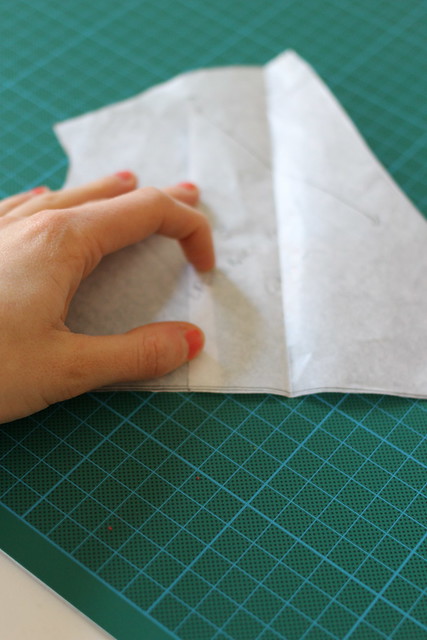
Step 1:
Slash up the middle of the pattern piece at a right angle to the seam line. Leave a wee hinge about 1.5cm long.
Overlap the edges by the amount you need to take out. (You can work this out by pinching out the excess on your muslin).
Tape the pattern pieces in place and smooth out the seam line to make sure it is straight.
Here it looks OK I think...
...but it is a bit off kilter at the centre back...whoops...
As the fabric (cotton) is quite thick and not particularly smooth, I thought it would be comfier to line the skirt so I used some lightweight yellow cotton batiste.
I attached the lining to the seam that joins the bodice and skirt pieces. Then I sewed the zip in, attaching it to both the outer fabric and the lining at the same time
I sewed on some ribbon to hide the seams on the inside. This ribbon just happened to be what I had lying around (pretty sure this ribbon was bought in Glasgow going on seven years ago or something silly, so nice I finally got round to using it...). But I actually think the colours go together really well together, as if it was all meticulously planned, ha.
The resulting colour scheme really makes me think of sweets and wrapping paper. So maybe I should wear it with black tights and black nail varnish or something so it is not too sickly sweet.
Don't look too closely, I see some stray ends of thread....
The lining is also fully contained in the hem, so there is no way it's going anywhere now that I've locked it down completely.
Now, to think about what kind of Belladone my third will be.

Cute! You know I love me a good stripey Belladone :) Now we are dress twins :D
ReplyDelete:) I'm definitely up for being dress twins!
DeleteVery cute! I really like the chevron detail :) Now I want to make another Belladone too!
ReplyDeleteThanks! Yeah I think once you find a pattern you really like it is tempting to just stick with it!
Delete